









The Unseeing Village: An Interactive Story
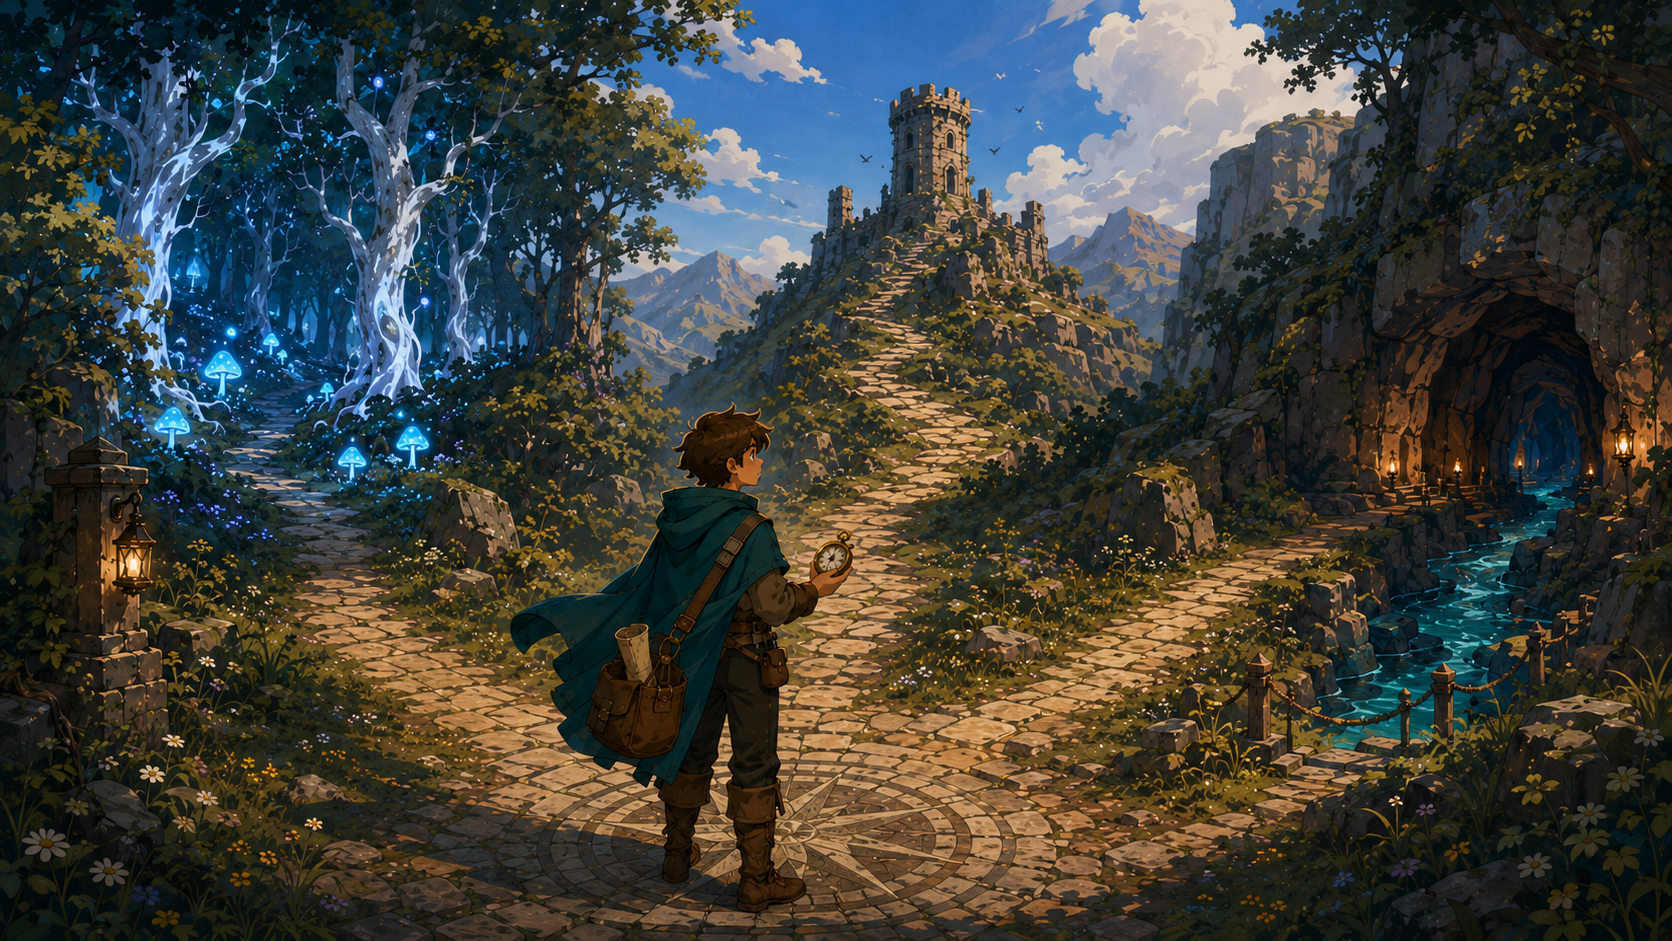
Beyond the final farmhouse, the road narrows beneath a weathered stone arch. Vines twist across its pillars, and mist pools inside the opening. Three symbols are carved above you: a tree, a broken watchtower, and a river beneath a cliff.
Past the arch, the road divides. The left path enters the Whispering Forest, where blue lights drift between pale trunks. The center road crosses open ground toward the ruined watchtower. The right trail descends between dark cliffs toward an underground river.
You check the cleric’s satchel. Rope, chalk, bandages, the clue from Maculara, and the villagers’ vision records remain safely packed. The records remind you that the treasure cannot be distributed through guessing. Whatever waits beneath the ridge must be matched to the person who will use it.
Words beneath the carvings read:
“Each road tests the hand, the mind, and the heart.”
Behind you, mist continues spreading across Maculara. Ahead, every path leads toward the hidden treasure beneath the northern ridge. Your choice will shape the trials that follow.
Which path will you take?
Pale leaves murmur overhead as you enter. The compass spins, then stops near three separate trails. Blue mushrooms mark one route. Old stones mark another. A cry for help comes from deeper among the trees.
Which trail will you follow?
The tower rises above empty fields. Its lower door is blocked by rubble, and most of the inner stairs have fallen away. Wind circles the upper platform, carrying a faint metallic hum.
Three routes remain: the outer wall, the old lifting platform, and a brass viewing device near the base.
Which route will you take?
The river enters a dark cave below the cliffs. Blue mineral light glows along the walls. Cold water echoes through unseen chambers.
Three routes continue: a shallow channel, a dry ledge, and an abandoned dock with timber and barrels.
Which route will you take?
The glowing mushrooms lead to a ravine crossed by a fallen tree. Far below, water strikes black rocks. A rope tied to one trunk looks old but usable.
How will you cross?
The stones appear every hundred steps, each one more worn than the last. The trail ends beside three standing stones arranged around an empty patch of soil.
One carries a faded carving. One leans at an angle. One has fallen face down.
Which clue will you inspect?
You follow the cry and find a young traveler beside the path. A thorn has torn their boot, and their ankle is swollen. They crossed the ridge before becoming lost in the forest.
How will you respond?
Narrow ledges circle the tower. A broken banner rope hangs from the upper level. Several stones look loose.
How will you climb?
The wooden platform rests beneath a broken pulley. Rusted gears line the wall, and a round brass piece lies under a fallen beam.
Where will you begin?
Circular glass plates face the northern ridge. Dust clouds their surfaces, and the alignment levers are frozen.
Tiny letters circle the smallest plate.
Which part will you inspect?
Cold water reaches your knees. The current grows stronger near a bend. Iron rings have been set into the wall.
How will you continue?
The ledge narrows near a waterfall. Spray makes the stone slick. Old water marks show that the river once flowed lower.
Which route will you try?
Old beams rest near an abandoned dock. Rope and empty barrels lie nearby. The current moves through a deep chamber before turning toward the ridge.
How will you prepare?
The trunk shifts beneath your boots. Wind pushes through the branches, and the satchel pulls against your shoulder.
A faint eye mark appears halfway across.
What will you do?
Downstream, stones break the surface in a crooked line. Several wobble under the current. A broken marker lies near the far bank.
How will you cross?
You tie the rope between two trees and stretch it above the ravine. One knot catches inside a hollow trunk. Something metal rests in the darkness.
What will you inspect?
The carvings show eyes looking left, right, then upward. Moss covers the final mark. The compass needle shifts with each direction.
How will you follow the sequence?
Loose soil surrounds the center stone. A metal edge glints near its base. Roots cover part of the object.
How will you uncover it?
The stone is heavy, yet its base fits a socket in the ground. A woodcutter watches from the trail, carrying a long pole.
How will you raise it?
You clean the cut and wrap it with cloth from the cleric’s satchel. The traveler relaxes as the pain fades.
They remember a stone eye near a hidden stair.
What will you ask?
The traveler says they crossed the ridge through a passage behind a waterfall. Their memory is clear, though the forest has turned them around.
How will you use the account?
You reach an abandoned shrine before nightfall. Its stone roof keeps out the rain. A carved eye sits above the doorway.
What will you do at the shrine?
Wind presses against your back as the ground drops away below. The upper window sits three body lengths above you.
How will you reach it?
Several stones shift under pressure. One stable row forms an upward spiral around the tower.
Which action will you take?
The rope is old but thick. You anchor it around a stone pillar and pull hard. A knot near the top holds something inside it.
What will you do?
You thread the rope through the upper wheel and test the platform with stones. The first knot slips. The second holds.
How will you complete the repair?
Three gears carry symbols for forest, tower, and river. A fourth socket sits empty beside them.
How will you turn the mechanism?
Broken wood, stone chips, and bent metal cover the floor. A round brass wheel rests beneath a beam.
How will you recover it?
As the dust lifts, distant objects come into sharper view. The final plate still carries a dark film.
What will you do?
Light passes through one plate, then another, forming a narrow beam. The last lever controls its direction.
How will you aim it?
Tiny letters describe spherical lenses for nearsightedness or farsightedness, toric lenses for astigmatism, and multifocal lenses for presbyopia. The plate fits over the route atlas like a viewing glass.
How will you use it?
The water rises to your waist, and loose stones shift beneath your boots. A blue light shines ahead.
What will you do?
A narrow strip of shallow water follows the cave wall. Handholds have been cut into the stone.
How will you use them?
You fasten the rope to the first ring. The second holds firm. The third turns under your hand.
What will you do?
The waterfall roars beside you, hiding every other sound. A dry arch waits behind the falling water.
How will you cross?
Mineral lines show that the river once sat lower. A dark opening waits beneath the current level.
How will you uncover it?
The work takes time, and the cave grows colder after sunset. Another traveler arrives with a hammer.
How will you finish the route?
The first knot slips, but the second holds. The raft settles low in the water.
What will you change?
The branch circles once, then drifts toward a side tunnel. The current slows near dawn.
How will you read it?
The office contains rotted papers and a brass compass rose fixed to the desk. A locked drawer sits beneath it.
What will you inspect?
You move across the fallen trunk before it can shift again. Wind bends the branches around you, and bark breaks loose beneath your final step. The moment you reach the opposite bank, the trunk drops several feet into the ravine.
Near the roots, you discover a blue metal token stamped with a tree and an open eye. Its edge carries an arrow aimed toward the northern ridge. The token once belonged to a forest guardian, and its direction matches the pull of the bronze compass.
You study each foothold before placing your weight on it. Several patches of bark hide deep cracks, so you move around them and keep close to the trunk’s stronger center.
Halfway across, you uncover an open-eye carving beneath a layer of moss. One line stretches toward the far bank and continues into the trees. After crossing, you follow the mark to a narrow trail that does not appear on the cleric’s map.
You fasten the cleric’s satchel against your chest, lower your body, and crawl across the trunk. The records remain secure while the wind shakes the branches above you.
On the far side, blue thread catches on the satchel buckle. It has been tied around a stone marker hidden in the grass. The marker bears the forest symbol and a short inscription naming the northern ridge as the road’s final point.
You test each stepping stone with a branch before trusting it. Two stones roll under the pressure, while a third remains firm beneath the current.
When you clear the moss from that stone, an arrow appears on its surface. It points toward a narrow path along the far bank. The path climbs between the trees and joins an older forest road aimed toward the northern ridge.
You leap across the narrowest spaces before the current rises. Water splashes over your boots, but you land beside a broken pilgrim marker on the far bank.
Inside the marker’s hollow base rests a metal disk marked with an open eye. Three lines circle the edge, though only the forest line remains darkened. The disk identifies this crossing as part of the western road toward the treasure.
You reset the loose stones and pack smaller rocks around their bases. The crossing takes longer to repair, but anyone following the trail will have firmer footing.
While moving the final stone, you uncover lettering beneath it. The inscription reads, “Cross with care, then follow the eye north.” A carved tree beside the words confirms that the stepping stones belong to the forest route.
You reach into the hollow trunk and pull out a round metal object wrapped in decayed cloth. It carries an open eye on one side and a tree on the other.
When you place it beside the bronze compass, both turn toward the northern ridge. A thin line of blue light spreads across the disk, revealing the words “Forest Road.” You have recovered one of the route tokens once carried by the treasure guardians.
You strengthen every knot before crossing the ravine. One rope passes around an old tree whose bark has grown over several carved letters.
As you tighten the line, loose bark falls away and reveals a short direction: “Shrine above, ridge beyond.” The rope crossing leads toward a hidden forest shrine that once marked the approach to the treasure.
You leave a strip of bright cloth beside the repaired rope so later travelers can spot the crossing. Before long, a lost traveler emerges from the trees and follows the marker toward you.
The traveler knows of a stone shrine farther north and recalls seeing an open-eye carving above its door. In thanks for the route marker, they point out a hidden path that avoids the thickest mist and leads toward the shrine.
You follow the carved eye sequence with your own gaze. First left, then right, then upward. At the final turn, sunlight breaks through the branches and touches a narrow stair cut into the hillside.
The stair climbs toward a forest shrine hidden above the trail. An open eye fills the shrine’s doorway, and a line carved beneath it points toward the northern ridge. The sequence was meant to guide travelers who knew how to read it.
You copy the eye sequence into the route atlas. When the three directions are drawn together, they form a shape already marked near the ridge.
A faded line connects the symbol to the forest road. The cartographer’s notes in the satchel identify the same shape as an old guardian mark. The stone sequence has restored the missing part of the western route.
You compare each carved direction with the bronze compass. The needle turns left, right, then settles north when you look upward.
Following its final direction, you notice a shrine roof above the trees. The compass hums as you approach, and a forest token carved into the stone points beyond the shrine toward the treasure beneath the ridge.
You dig through the loose soil with your hands and uncover a small stone box. Inside rests a metal route token beside a carved stair symbol.
The token bears a tree on one side and an open eye on the other. Its edge names a shrine north of the standing stones. When held beside the compass, the token points toward the hidden stair above the forest.
You probe the ground with a branch before disturbing the soil. A hollow sound answers beneath the center stone.
After clearing the earth, you uncover a sealed box containing a strip of metal. The strip shows the standing stones, the forest shrine, and the northern ridge in one line. It is a route record rather than buried treasure.
You clear the roots without cutting them. As the soil loosens, the roots lift around a thin engraved plate.
The plate depicts the forest from above, with a marked road passing the standing stones and climbing toward a shrine. A final line reaches an open-eye door beneath the northern ridge. The plate fills the missing section of the cleric’s route map.
You push against the fallen marker until it settles upright inside its stone socket. Sunlight strikes the front surface and reveals letters hidden beneath dirt.
The message names the forest shrine and states that the northern ridge lies beyond it. A tree symbol appears beside an open eye, linking the marker to the western road. Raising the stone has restored a sign unseen for generations.
You ask the woodcutter to lift the fallen marker with you. Once it stands, he recognizes the symbol on its face from paths used by his family.
He describes an overgrown trail beyond the shrine where the trees grow in two straight rows. The trail leads toward the ridge but disappeared from public use after storms closed the forest road. His memory gives you the next part of the route.
You inspect the empty socket before moving the fallen stone. A brass eye rests beneath it, protected from rain and soil.
The object fits into a circular hollow on the marker’s face. When placed there, a blue line appears along the ground and points toward the shrine. The stone was part of a route device waiting for its missing center.
You share food with the traveler and wait until the pain in their ankle fades. As they rest, they describe a stone shrine seen shortly before they became lost.
The shrine stands near a waterfall and carries an open eye above its entrance. The traveler also remembers three lines carved beneath it, though the forest line was the clearest. Their account places the shrine along your road toward the northern ridge.
You ask the traveler to describe every landmark seen near the hidden stair. They mention a split oak, a stream shaped like a crescent, and three stones arranged beside the trail.
You mark each detail in the route atlas. Together, the landmarks form a direct path through the forest toward the shrine. The bronze compass turns north as soon as the final mark is added.
You show the traveler the copied pages from the cleric’s records. Their eyes stop on the open-eye seal beside the forest symbol.
They saw the same mark carved into a stair near the ridge. Beneath it were smaller tower and river symbols, showing that the routes meet farther north. Their memory connects the forest trail to the other two roads.
You ask the traveler to draw the way toward the waterfall. They sketch a stream, a split tree, and a trail hidden behind thick ferns.
The drawing matches an erased line in the route atlas. When restored, the line reaches a waterfall beneath the northern ridge. The traveler’s sketch gives you a route through the part of the forest where the compass spins without settling.
You compare the traveler’s directions with the old atlas. Their landmarks match a road removed from later maps.
A hidden line runs behind the waterfall and enters a passage beneath the ridge. The forest route does not end at the shrine. It continues through the rock toward the stone door guarding the treasure.
You invite the traveler to return toward the ridge with you. They agree and guide you through paths that twist away from the marked road.
Near sunset, the trees open around a stone shrine. Behind it, a stair climbs toward the ridge. The traveler has turned a remembered route into a clear path forward.
You light a fire inside the abandoned shrine and wait until dawn. During the night, the open-eye carving above the door catches faint blue light from the mist.
When morning arrives, the light falls across a stair hidden behind the shrine wall. Each step carries a tree mark, while the top landing points toward the northern ridge. Waiting has revealed a path darkness kept concealed.
You inspect the shrine walls while the traveler rests. A row of carvings tells the story of three guardians, one in a forest, one at a tower, and one beside a river.
The final scene shows all three standing before an open-eye door beneath the ridge. A narrow line beneath the forest guardian points toward a hidden passage behind the shrine. The wall art doubles as a route record.
You give the traveler your spare cloak and ask about the token hanging from their neck. They explain that it belonged to a grandparent who once worked along the forest road.
The token carries an open eye and three route symbols. When held beside the compass, its tree mark glows and points toward a stair behind the shrine. In thanks for your care, the traveler entrusts the token to you.
You reach for the upper window and pull yourself into the tower chamber. Dust covers the floor, but a map has been carved into the stone beneath it.
Three roads circle the northern ridge. The tower road runs straight toward an open-eye door, while forest and river routes approach from either side. Reaching the chamber has revealed how the tower fits within the larger path to the treasure.
You pause at each corner and inspect the wall before climbing farther. Near the second turn, a stair symbol appears beneath a patch of lichen.
The symbol points toward a narrow opening above the main window. Inside, you uncover steps leading to an observation room. The careful climb has revealed an entrance hidden from anyone rushing toward the top.
You tie the satchel close before making the final climb. The records remain secure as you cross a broken ledge and enter the upper room.
Beside the window, a brass plate carries a tower symbol and an open eye. It names the northern ridge and shows two other roads joining the tower route below the stone door. The records and route plate can now be compared without damage.
You follow the row of stable stones spiraling around the tower. The path ends at a sealed observation room near the top.
A tower symbol is pressed into the door. When the bronze compass touches it, the lock releases. Inside, you discover maps, viewing plates, and a route drawing aimed toward the northern ridge.
You mark every unsafe stone with chalk before climbing past it. Near the highest weak section, your chalk catches on letters carved into the wall.
The message warns of a broken ledge ahead and names a safer turn around the eastern side. Beneath it, a tower symbol points toward the observation room. Marking the danger has also uncovered the road keeper’s directions.
You leap across the broken section and land beside a brass route plate fixed to the wall. It carries a tower on one side and an open eye on the other.
A narrow groove points toward the northern ridge. When the compass rests inside the groove, a blue beam shines through the upper window. It lands on a distant mark in the rock.
You replace the weakest section of the banner rope with the rope from the cleric’s satchel. The repaired line holds firm against the tower wall.
As you climb, the new rope pulls an old banner free from the stone. Hidden behind it is a carved route showing the tower road leading north. Repairing the line has revealed the sign once concealed by the fallen banner.
You lower the rope for a climber stranded below. Once inside the tower, the traveler explains that they came searching for an observation room mentioned in an old family record.
They know of a concealed door behind the tower bell frame. Together, you uncover the room and locate a viewing device aimed toward the northern ridge. The rescue has gained you a guide through the tower.
You inspect the knot near the upper ledge and discover a small metal token woven into the rope. One side bears a tower, while the other carries an open eye.
The token fits into a slot beside the observation room door. Once inserted, the door opens and reveals the tower’s route instruments. The old rope held more than a climbing line. It guarded the room’s missing piece.
You add a second knot at every joint and test the platform with stones. The ropes tighten evenly, and the wooden floor rises without tilting.
At the upper landing, you discover a route inscription carved beside the pulley wheel. It states that the tower road meets the forest and river paths beneath the northern ridge. Your careful repair has brought the platform back to its intended destination.
You invite nearby field workers to test the repaired platform with you. Their combined weight causes one loose gear to click into place.
The oldest worker remembers hearing the same sound during childhood visits to the tower. He points out a hidden lever beside the landing. Pulling it opens the observation room and exposes a map of the three roads.
You ride the platform alone during its first lift. The ropes creak, but the platform rises steadily toward the upper chamber.
At the top, you secure the mechanism and lower it again for the waiting workers. Inside the chamber, a tower token rests beside a viewing device aimed at the northern ridge. The first climb has reopened the path for everyone behind you.
You fit the bronze compass into the empty gear socket. The gears begin turning, and a panel opens in the tower wall.
Behind it rests a metal map showing three roads around the northern ridge. The tower road is marked by a straight blue line. The compass was designed to awaken the mechanism and reveal the path hidden inside.
You rotate the gears into the route order shown on the cleric’s map: forest, tower, river. The platform shudders, then rises toward the observation deck.
As it moves, blue lines appear across the tower wall. They form an open eye around the ridge and place each road along one edge. The gear order is also the route order.
You clean the rust from the gear teeth before moving them. Letters appear beneath the grime, naming the three roads and the sequence needed to turn the mechanism.
Following the inscription, you align the gears and open the observation room. The device inside points toward a stone mark beneath the northern ridge. Cleaning the mechanism has restored both its movement and its message.
You lift the fallen beam and pull the brass wheel from beneath it. The wheel fits the missing axle inside the platform mechanism.
Once attached, the lift rises toward the upper landing. A tower symbol appears along the wheel’s rim, followed by the words “Road to the Open Eye.” Recovering the part restores the platform and identifies its original purpose.
You ask the field workers to raise the beam together. Beneath it, you uncover both the missing wheel and a stair hidden below the rubble.
The stair reaches a lower chamber filled with route records. One wall shows the tower path meeting the forest and river roads beneath the northern ridge. Working together has opened a route no single person could clear alone.
You examine the brass wheel before attaching it. Its center is made from a curved glass plate rather than solid metal.
When held over the route atlas, the plate reveals hidden ink beneath the northern ridge. It shows an open-eye door and three roads approaching it. The missing wheel is also a viewing lens, built to expose marks invisible without it.
You clean the final glass plate twice, removing a dark film from its center. Through the restored device, a blue stone door appears beneath the northern ridge.
Three faint roads approach it from separate directions. The tower route forms the clearest line from your position. The device confirms that the treasure entrance is real and places it within sight of the watchtower.
You compare the view through the device with the blacksmith’s sketch carried in the village records. His drawing of the blue flash matches the mark visible on the ridge.
The angle from the tower also lines up with the road he saw on the first night of the Blindness. His account from Maculara and the tower’s view now point to the same stone door.
You rotate the clean plates into a new order. Light bends through them and draws an open eye across the chamber wall.
A tree, tower, and river appear around the eye as separate symbols. The tower stands at the center of the display, while the other routes approach from either side. The viewing device doubles as a map of the three roads.
You calculate the final angle from the ridge height and the position of the afternoon sun. The narrow beam crosses the valley and lands on a blue mark in the rock.
A stone outline becomes visible around the mark. It resembles the open-eye door shown in Maculara’s records. Careful measurement has turned a distant glow into a precise destination.
You move the last glass plate according to instinct. The beam swings across the ridge, disappears, then flashes over a hidden stone door.
The compass hums as the light settles. Three marks around the door answer with brief blue glows. Your quick adjustment has uncovered the treasure entrance before the sun drops behind the hills.
You record every lever position before changing the device. The notes preserve the exact angle that points toward the ridge.
After several adjustments, the blue door comes into view. You return the levers to the recorded position and confirm the result. Future searchers can use the same settings without repeating the full search.
You copy every word circling the smallest plate into the cleric’s records. The writing names spherical, toric, and multifocal designs, along with the vision needs connected to each one.
A final line names the open-eye chamber beneath the northern ridge. The plate links the road to the treasure waiting inside and confirms that separate vision needs call for separate prescriptions and lens designs.
You hold the smallest glass plate over the route atlas. Lines invisible on the bare page appear beneath the curved surface.
The hidden marks show a passage from the watchtower road to the northern ridge. Forest and river lines join it near the open-eye door. The plate restores the missing portion of the map.
You compare the plate’s wording with the symptom records from Maculara. The categories resemble the separate vision changes reported by the villagers.
The connection confirms that the treasure chamber was built for varied vision needs. The roads do not lead toward a single cure. They lead toward items arranged for eyes that require separate prescriptions and lens designs.
You push through the strongest part of the current and move toward the blue light ahead. The water rises, then drops as you reach a calm stone chamber.
An open-eye carving covers the far wall. Three route symbols surround it, and the river mark glows beneath your hand. The chamber is part of the eastern road toward the treasure.
You plant each foot before taking the next step. The current pulls at your legs, but the satchel remains above the water.
Near the bend, you discover shallow steps cut into the riverbed. They lead toward a dry landing marked with a river and an open eye. Moving slowly has kept the records safe and uncovered the intended crossing.
You pull a stranded cave goat onto a dry shelf beside the river. Once free, the animal moves behind a cluster of rocks and disappears through a narrow opening.
Following it, you discover a route carving hidden beyond the shelf. The carving points toward a chamber below the northern ridge. Helping the animal has revealed a passage concealed from the main current.
You follow the carved handholds along the wall. The water stays shallow until you reach an old pilgrim landing.
A river token rests inside a small niche above the landing. Its open-eye mark points toward a stair leading deeper into the cave. The handholds were placed to guide travelers toward the treasure road.
You inspect the marks between the handholds. At first they resemble scratches, but repeating letters form a sentence:
“Door above the falls.”
The final handhold points toward a ledge near the waterfall. A river symbol beneath the message confirms that the passage continues behind the falling water toward the ridge.
You clear sharp stones from the shallow strip beside the wall. Beneath one stone, a metal plate appears.
The plate shows the river route passing the handholds and reaching a landing near the ridge. By clearing the crossing for others, you have uncovered the map that explains where it leads.
You twist the turning iron ring farther. Stone shifts beside the river, opening a narrow wall panel.
Inside rests a river token and a strip of parchment sealed inside glass. The parchment shows the panel’s passage joining two other roads beneath the northern ridge. The ring was both an anchor and a hidden latch.
You test every iron ring before placing your weight on the rope. The final ring carries an open-eye seal beneath a layer of mineral deposits.
When cleaned, the seal reveals a river symbol and an arrow toward the waterfall. The stable rope line now follows the same direction as the old route marker.
You leave the rope secured along the cave wall for the return trip. Bright cloth knots mark each iron ring.
The completed line creates a route the cleric and transport teams can follow later. Near the final knot, you notice a carved message naming the river road and its meeting point beneath the northern ridge.
You move through the waterfall spray without stopping. Water strikes your shoulders, but a dry stone arch waits behind the falling curtain.
An open eye is carved above the arch, with the river symbol beneath it. Beyond lies a stair climbing toward the northern ridge. The waterfall concealed the next part of the road.
You face the wall and slide sideways across the narrow ledge. Each movement brings you closer to a carved eye hidden behind the spray.
The carving points toward a dry opening beyond the waterfall. Three lines surround it, showing the river path joining the forest and tower roads beneath the ridge.
You tie the rope around a stone column before crossing the ledge. The line gives you a firm handhold through the spray.
While securing the final knot, you uncover letters cut into the column. They name the river landing and warn travelers that the road rises behind the falls. The rope now marks a safer route toward that passage.
You wait beside the ledge until the river begins to fall. Slowly, the dark opening beneath the water clears.
Stone steps emerge from the current and descend into a lower chamber. An open-eye seal marks the far wall, while a river line points toward the northern ridge. Patience has exposed a route hidden at higher water.
You feel beneath the water for carved edges. Your hand closes around a metal plate fixed to the submerged wall.
Once lifted into the light, the plate shows the river road entering a stair below the waterfall. The final mark is an open-eye door beneath the ridge. The water hid the route record without destroying it.
You divert a narrow stream with loose stones and lower the water near the wall. A passage appears behind the current.
Inside, blue markings trace the river path toward the northern ridge. Two other lines join it near the stone door. Moving the water has uncovered the meeting point of all three roads.
You complete every foothold before stepping onto the ledge. The cut stone gives you a stable route through the narrowest section.
At the far side, you discover a river guardian’s mark and an inscription naming the treasure chamber. The footholds remain for the cleric and transport teams when they cross later.
You share your tools with another traveler who arrives at the ledge. Together, you finish the footholds before night.
The traveler recognizes the open-eye marks in the stone from a family record. They show you a dry passage behind the waterfall, where the river road rises toward the northern ridge.
You search the stone chips for markings before sweeping them aside. One fragment carries half of an open-eye seal.
The matching half remains in the ledge wall. When the fragment is returned to the hollow, a hidden panel opens and reveals a route map. The river line ends beneath the northern ridge beside the forest and tower paths.
You add another barrel beneath the raft and retie the beams. The added balance keeps the platform level when you step aboard.
Across the deepest chamber, the raft reaches a stone landing marked with a river symbol. An inscription beside it points toward the northern ridge and names the landing as part of the treasure road.
You launch before the current rises. The raft moves swiftly through the dark chamber and turns toward a blue light.
The current places you beside a stone landing near the ridge. Three road symbols are carved above it, though the river line glows brightest. The timing of your launch has carried you directly to the final river passage.
You build enough room for another passenger. Before departure, a stranded miner emerges from the dock office and asks to cross with you.
The miner knows of a hidden landing near the northern ridge. In return for the place aboard, they guide the raft through a side current that reaches the stone steps below the treasure door.
You follow the floating branch on foot along the bank. It drifts into a side tunnel and stops beside a stair cut into the cave wall.
The stair carries a river symbol on each step. At the top, an open-eye mark points toward the northern ridge. The branch has traced the current leading closest to the treasure road.
You mark the current speed in the cleric’s notes and compare how quickly the branch moves through each tunnel.
One side passage has a slower, steadier current aimed toward the ridge. A carved landing waits at its end. The notes give you a safer route for crossing and a useful record for the transport teams.
You wait until dawn, when the river reaches its calmest point. The raft crosses the deep chamber without spinning toward the rougher tunnels.
Morning light enters through a crack near the far landing and reveals an open-eye carving. The river road continues up a stair toward the northern ridge.
You turn the brass compass rose fixed to the dock office desk. A drawer opens beneath it with a soft click.
Inside rests a map of the river tunnels. One route is marked in blue and leads toward a landing beneath the northern ridge. The forest and tower roads appear above it, meeting at the same stone door.
You rebuild the boat plan from the surviving scraps. The completed drawing shows a raft route through the deep chamber and into a side current.
At the end is a landing marked with an open eye. A note states that the stair above joins the other roads beneath the ridge. The damaged papers still carry enough detail to guide the crossing.
You gather the dry papers from the dock office and wrap them inside the satchel. One page bears the name “Clear Sight Treasure.”
Below the title is a river route ending at a stone stair. The page also shows forest and tower symbols meeting at the same northern door. The dock records confirm that the underground river was one of three guarded roads.
End of Chapter 2
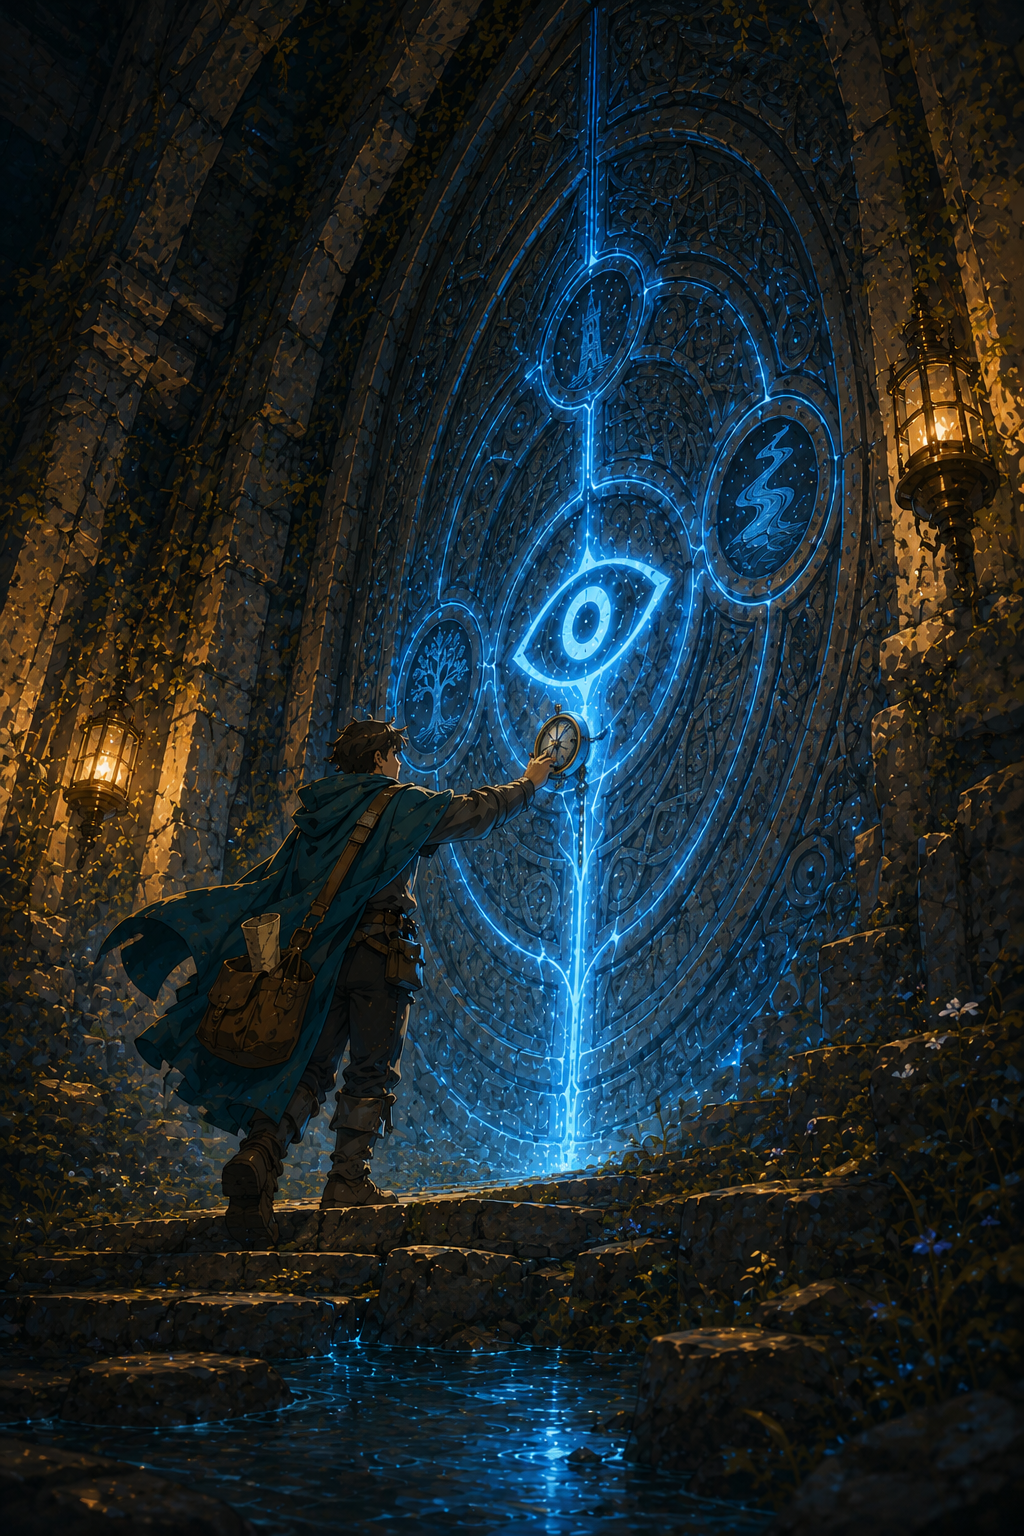
Whichever road you chose, it ends beneath the northern ridge at the same circular stone door. An open eye fills its center, surrounded by three spaces shaped like the forest, tower, and river tokens.
You place your clue into the matching space and press the bronze compass against the eye. Blue light travels through the carvings, and the stone begins to move.
Beyond the doorway, shelves of sealed contact lenses and carefully written ledgers stretch into the chamber. Labels divide the stock by manufacturer, lens design, and replacement schedule, while blank records wait for each villager’s prescription, exact product name, and quantity.